About
App Roles
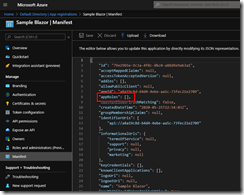
To create roles such as (Reader, Writer, SuperUser) add the following objects to the appRoles array.
"appRoles": [
	{
		"allowedMemberTypes": [
			"User"
		],
		"description": "Reader all data.",
		"displayName": "Reader",
		"id": "254a1feb-715d-4a0f-9dfd-fef415381051",
		"isEnabled": true,
		"lang": null,
		"origin": "Application",
		"value": "Reader"
	},
	{
		"allowedMemberTypes": [
			"User"
		],
		"description": "Read/Write all data",
		"displayName": "Writer",
		"id": "cbd3dbc4-0db7-4a9e-a26f-b3588e798daf",
		"isEnabled": true,
		"lang": null,
		"origin": "Application",
		"value": "Writer"
	},
	{
		"allowedMemberTypes": [
			"User"
		],
		"description": "Super Users can see something special",
		"displayName": "SuperUser",
		"id": "b7d5415e-2ff2-48bb-a619-45a6a70dc733",
		"isEnabled": true,
		"lang": null,
		"origin": "Application",
		"value": "SuperUser"
	}
	],
NOTE: the guids need to be unique. Create them in Powershell or Package Manager Console by running: [guid]::NewGuid()
Assign Roles to Users
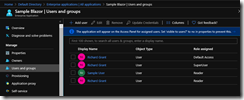
In the Default Directory go to Enterprise applications. Find the app in the list (Sample Blazor), then in “Users and groups” add users and roles as required.
Blazor Client Roles
In the client app create a new Folder called “Auth” and create a class called “SampleBlazorUserAccount”.
public class SampleBlazorUserAccount : RemoteUserAccount
{
	[JsonPropertyName("groups")]
	public string[] Groups { get; set; } = new string[] { };

	[JsonPropertyName("roles")]
	public string[] Roles { get; set; } = new string[] { };
}
This is very similar to here but includes initializing with blank arrays. (I had trouble with this because I was using the free Azure off my microsoft account and that doesn’t allow use of roles)
Create the factory class in the same folder.
public class SampleBlazorUserFactory : AccountClaimsPrincipalFactory<SampleBlazorUserAccount>
{
	public SampleBlazorUserFactory(NavigationManager navigationManager,
		IAccessTokenProviderAccessor accessor)
		: base(accessor)
	{

	}

	public async override ValueTask<ClaimsPrincipal> CreateUserAsync(
		SampleBlazorUserAccount account,
		RemoteAuthenticationUserOptions options)
	{
		var initialUser = await base.CreateUserAsync(account, options);

		Console.WriteLine($"CreateUserAsync() initialUser.Identity.IsAuthenticated: {initialUser.Identity.IsAuthenticated}");

		if (initialUser.Identity.IsAuthenticated)
		{
			var userIdentity = (ClaimsIdentity)initialUser.Identity;

				foreach (var role in account.Roles)
				{
					userIdentity.AddClaim(new Claim("role", role));
				}

				foreach (var group in account.Groups)
				{
					userIdentity.AddClaim(new Claim("group", group));
				}
		}

		return initialUser;
	}
}
Fix up the missing using statements with Ctrl+.
Register the factory in Program..Main by updating the following lines.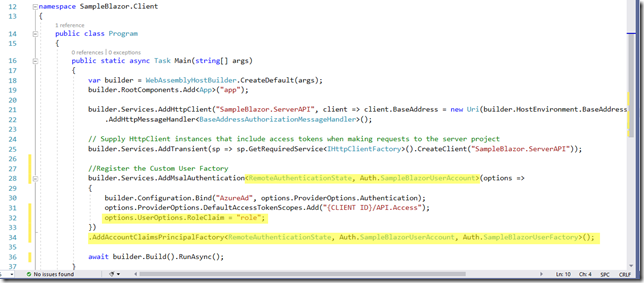
For the sake of showing an authorization example create another Get method on WeatherForecastController to return something for the SuperUsers. Copy the Get method and change the following code.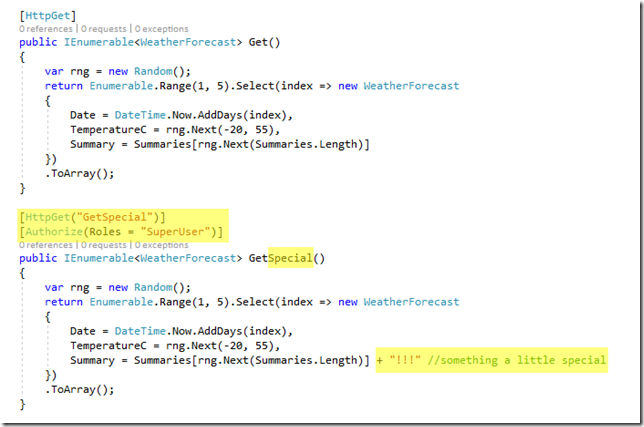
NOTE: The roles string can be refactored into a class in the Shared project. like so: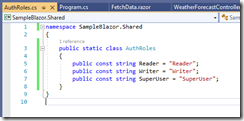
public static class AuthRoles
    {
        public const string Reader = "Reader";
        public const string Writer = "Writer";
        public const string SuperUser = "SuperUser";
    }
In which case the Authorize attribute would be replaced with 
Client UI
In the FetchData.razor file of the client project add an AuthorizeView section.
<AuthorizeView Roles="@AuthRoles.SuperUser">
    <Authorized>
        <button class="btn btn-outline-primary" @onclick="GetSpecialForecast">Get Special Forecast</button>
    </Authorized>
</AuthorizeView>
and in the code section write the button handler
private async Task GetSpecialForecast()
{
	forecasts = null;
	StateHasChanged();

	try
	{
		forecasts = await Http.GetFromJsonAsync<WeatherForecast[]>("WeatherForecast/GetSpecial");
	}
	catch (AccessTokenNotAvailableException exception)
	{
		exception.Redirect();
	}
}
Run the program and if the logged on user is a Super User then they will get a special button to load the summaries with the exclamation marks.
