About
Part 2 of Blazor Fullstack.
In this post we’ll register the app in AAD.
Register App in Azure Active Directory
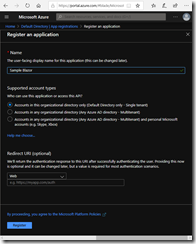
Following the instructions from here goto App Registrations in Azure. Create a New Registration and call it Sample Blazor. Select Single tenant.
Expose the API – server
In Expose an API
- “Add a scope”
- leave the Application ID URI as default and “Save and continue”
- Give it a name “API.Access”
- Select “Admins only” for Who can consent.
- Set “Admin consent display name” to “Access API”
- Set “Admin consent description” to “Allows the app to access API endpoints”
- Set “State” to Enabled
- Click “Add Scope”
Redirect URIs – client
In Authentication select “Add a Platform” and choose Web.
- Enter
https://localhost:5001/authentication/login-callbackfor the Redirect URI. - Leave Logout URL blank.
- Check both boxes for Access tokens and ID tokens.
- Click Configure
5001 is the default port for running an app on Kestrel. Return to this section and add another entry after the project is created and you know the port for IIS. And again when deploying to PROD.
API Permissions – client
in “API Permissions” confirm that Microsoft Graph has at least User.Read permissions. NOTE: if JobTitle is required to be shown then replace User.Read with User.Read.All
Add the API.Access by
- clicking “Add a permission”,
- select My APIs,
- select the name of the app, “Sample Blazor”
- check API.Access
- Click “Add permissions”
- Click “Grant admin consent for Default Directory”
The API permissions page should resemble this:
Record the config settings
|
SETTING |
EXAMPLE |
| TENANT DOMAIN | contoso.onmicrosoft.com |
| TENANT ID |
222222222-2222-2222-2222-222222222222 |
|
CLIENT ID |
11111111-1111-1111-1111-111111111111 |
| SERVER API APP ID URI | https://contoso.onmicrosoft.com/11111111-1111-1111-1111-111111111111 |
|
DEFAULT SCOPE |
API.Access |
